
After accessing the Manage Credit and Enrollment screen (People > Manage Credit and Enrollment), click the Set Filters button on the top toolbar.
Select the View by Person radio button at the top of the Filters and Options pop-out screen.

When using the View by Person option, you must first select the user. You can only view results for one user at a time when using this option.
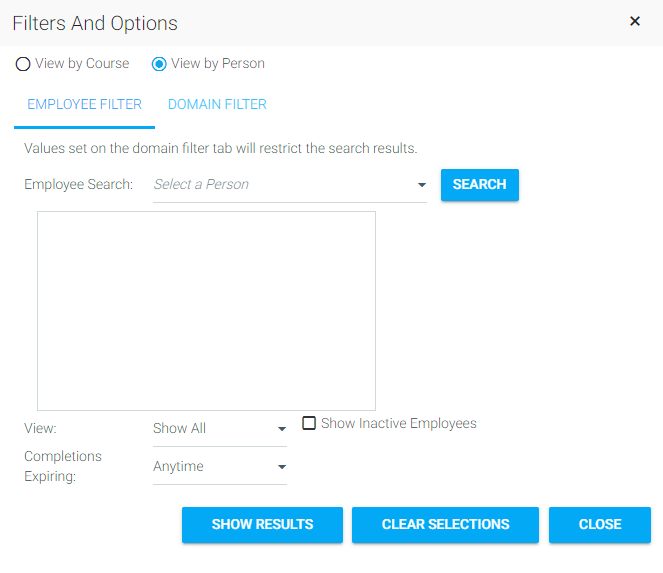
If you know the name of the user, type in the last name, then click Search. You can also just click Search and all users visible to your security level will be listed.
The audience drop-down helps to limit the results for the selected person. The options included are:
The Completions Expiring optional drop-down limits the results to only courses that are expiring (or are expired) in the selected time frame.
The Show Inactive Employees box must be selected if you need to search for an inactive user.
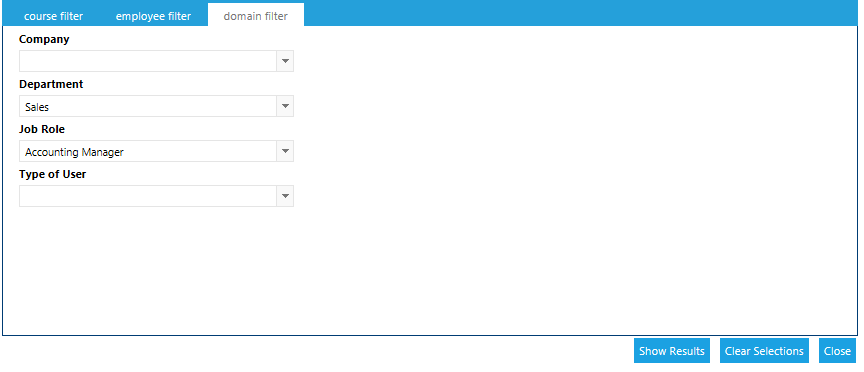
The Domain Filter is an optional filter that allows you to limit your search results. For example, if you wanted to see every user in a specific job role, select that job role; then, on the Employee filter, click Search. In the Employee Search box you will see the results of everyone you are allowed to see in that job role.
Return to the Employee Filter tab. Select the name of the user you wish to see results for, even if there is only one in the list.
Click Show Results.
The Filters and options pop-up will retain your selections after you leave this screen to work in the Results grid. To ensure that you don't have any forgotten selections affecting your new results, click the Clear Selections button each time that you need to select new criteria on the Filter and Options pop-up.
Example: On the View by Course option, you use the Domain filter to limit your results to just the Sales Department . After you are done, you decide to switch to View by Person and need to select an employee in the Customer Service Department. If you don't Clear your Selections, your Sales Department domain selection will limit your Employee Search to just employees in the Sales Department.
At times you will need to enroll a user and/or grant credit for a course that is not on their Plan or History. To do so, go to People > Manage Credit and Enrollment in the administrative menu.
Select View by Person on the Filters and Options pop-up and search for the user in the Employee Filter tab. Once the desired user has been found click Show Results in the bottom right hand corner.
The Results grid will populate with all of the courses on the selected user’s Development plan and/or History.
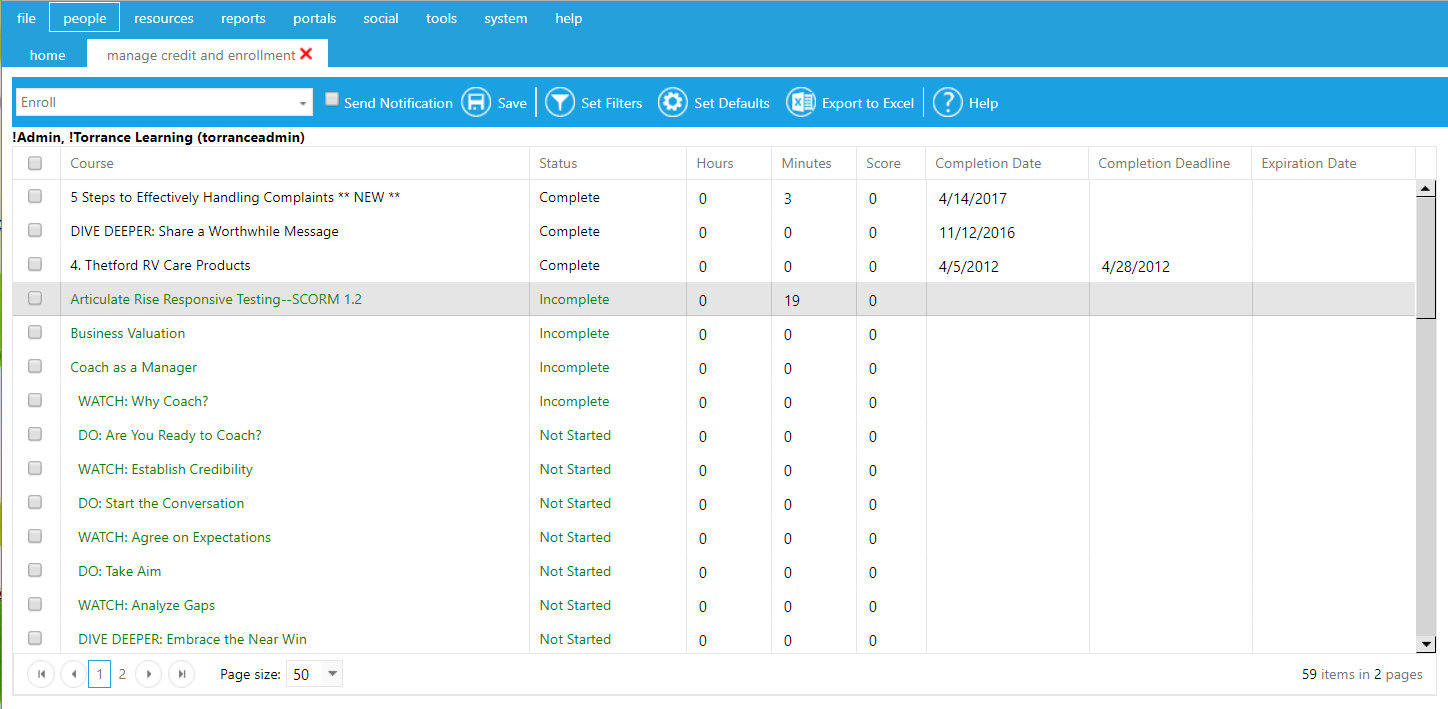
In the Actions drop-down, select Enroll. Select the Send Notification check box if you want the user to receive an email notification about this enrollment. Click Save.
The Enrollment box pop-up will open.
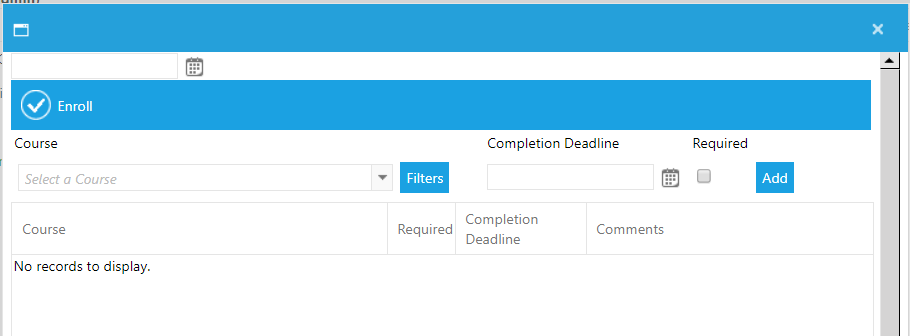
If you know the name of the course in which you want to enroll the user, begin typing the course name in the Course drop-down. Select the appropriate course when it appears in the menu.
You can use the Filters button to limit the courses that will appear in the course box. When the Filters button is used, the Course Filters pop-up will open. Select Course Type, Category, Media Type, or Provider.
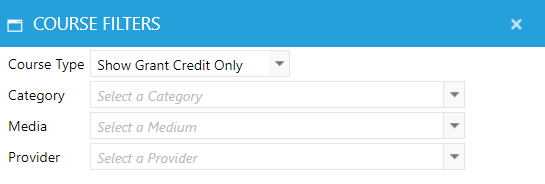
Once you have set the filters, close the filters box and return to the course list. Now only courses that meet the specified criteria will be visible.
Select the course, then set the Completion Deadline. If the course should appear in the required section of the Learning Plan, check the Required box. Then click Add.
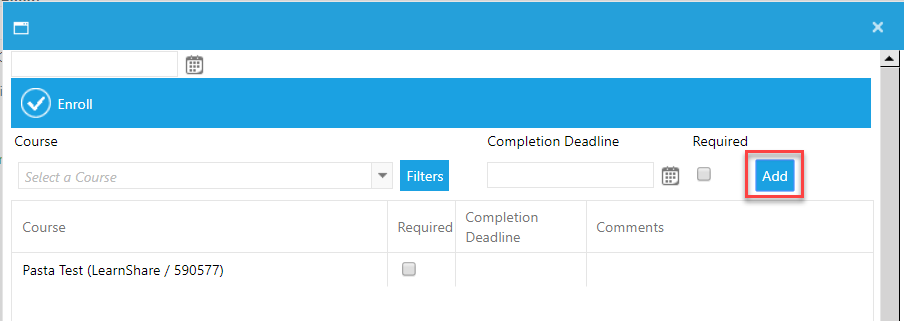
If each of the courses have a different completion deadline, the deadline can be set in the results grid once the course has been added. The Required box can also be checked and any necessary comments can be added.
Once all courses have been added, click Enroll in the top left corner of the Enrollment pop-up window. You will see a confirmation screen. If the information is correct, click OK. If you need to make any changes, click Cancel. Cancelling will take you back to the previous screen so that you can make any necessary changes.
Once you click OK, you will be redirected back to the results grid. The selected course name(s) should now be in green, confirming that an enrollment has been created.
As an administrator, you may run into a situation where a user has reached their attempt limit on an assignment, such as a quiz, and they have not yet passed the quiz.
To handle this scenario, navigate to People > Manage Credit and Enrollment. Locate the enrollment and click the checkbox next to it. Then, use the drop-down menu in the top toolbar to select Revoke Completion.
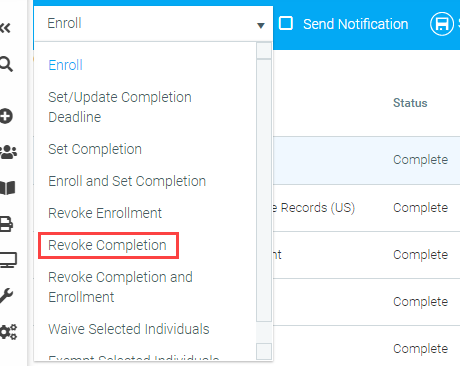
As long as the user is in a required audience for this course, this will bump them back to "Not Started" status for this assignment, which will allow them to attempt completion again.
If the course is OSHA-related, this functionality will not be available.